
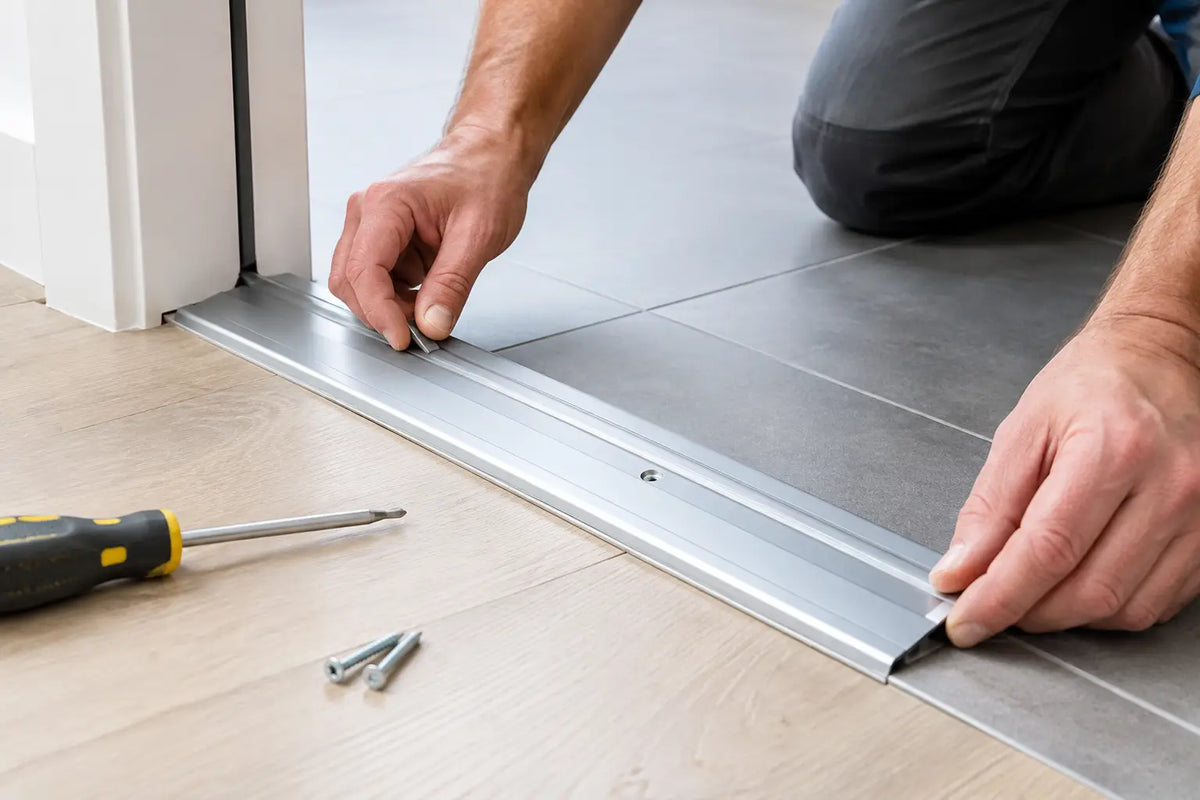
Installing an aluminium door threshold correctly helps prevent draughts, reduce water ingress and ensure the door opens and closes smoothly. Knowing how to install an aluminium threshold starts with measuring the doorway accurately, selecting the right threshold profile and securing it without affecting weatherproofing or door clearance.
Aluminium thresholds are durable, low-maintenance and available in profiles for internal floor transitions, external entrance doors, patio doors and accessible doorways. The best option depends on the application, including the floor finishes, exposure to weather and compatibility with the door's seals and cill. Choosing the correct aluminium door threshold is essential for a neat finish, reliable performance and a properly sealed doorway. Not all threshold profiles are interchangeable, so always check the manufacturer's fitting instructions before installation.
Choose the right aluminium threshold first
Before cutting or drilling, establish what the threshold needs to do. A flat or gently ramped profile is often used between floor coverings, helping to cover an expansion gap and reduce a change in level. A deeper external threshold may include drainage channels, a raised weather bar or a section designed to meet a particular door bottom seal.
For an outward-opening external door, water management is particularly important. The profile must sit the right way around so rain is directed away from the building rather than towards the internal floor. Check the manufacturer's orientation marks and fitting guidance where supplied. A threshold that looks symmetrical is not always symmetrical in use.
Also allow for the finished floor level on both sides of the doorway. This matters on refurbishment work, where laminate, engineered timber, tiles or carpet may be added after the door frame has been fitted. If the threshold is installed too high, the door can scrape. Too low, and the seal may not make contact or the profile may leave an exposed gap.
For fire doors, use only a threshold arrangement that is compatible with the tested doorset specification. A standard aluminium floor threshold should not be added to an FD30 or FD60 door simply to improve appearance. Fire doors rely on tested clearances, seals and components, so speak to the door or doorset manufacturer where there is any doubt.
Tools and materials for fitting an aluminium threshold
The exact fixings depend on the subfloor, but most installations require the following:
- Tape measure, pencil and square
- Fine-tooth hacksaw or mitre saw suitable for non-ferrous metal
- Drill, appropriate drill bits and countersink bit if required
- Suitable screws and wall plugs, or masonry fixings for concrete
- Low-modulus neutral-cure silicone sealant and a sealant gun
Use neutral-cure silicone around aluminium, painted surfaces and many flooring finishes. Some sealants can stain porous stone, react with certain materials or make future removal unnecessarily difficult. If fitting over natural stone, vinyl or a specialist floor finish, check that the sealant is suitable before applying it.
How to install an aluminium threshold step by step
1. Check the opening and door clearance
Start with the door shut, if it is already hung. Measure the clear width between the jambs at the point where the threshold will sit. Take the measurement at the floor, not higher up the frame, as older openings can be slightly out of square.
Next, check the gap beneath the door across its full width. If the floor rises towards one side, a threshold may fit at one end but foul the door at the other. It is much easier to correct the threshold choice or door clearance before drilling than after the profile has been sealed in place.
For new doorsets, confirm whether the threshold forms part of the supplied system. Pre-assembled external doorsets may have a dedicated sill or threshold profile with pre-drilled fixing points. Replacing it with a generic alternative can affect weathering, security performance and the manufacturer's warranty.
2. Prepare a clean, level fixing surface
Remove old sealant, loose adhesive, grit and any protruding screw heads from the floor. The threshold needs continuous support along its length. Packing one section to compensate for an uneven floor can leave a gap beneath the rest of the profile, allowing movement and eventually cracking the seal.
Check the area with a straightedge. Minor imperfections can often be accommodated with sealant, but a noticeably uneven concrete threshold or damaged timber sill should be repaired first. On an external doorway, make sure the substrate falls away from the property where the surrounding construction allows. The threshold should not create a dam that holds standing water against the frame.
Dry-fit the profile before applying sealant. Place it in position and open and close the door several times. Confirm that it sits neatly under the door, covers the intended gap and does not interfere with hinges, weather bars or seals.
3. Measure and cut the threshold accurately
Mark the required length on the aluminium profile using a pencil and square. Where possible, leave a small clearance at each end rather than forcing the threshold tightly between the frame legs. This gives room for a controlled sealant joint and allows for normal seasonal movement in adjoining materials.
Cut slowly with a fine-tooth blade to avoid burring the cut edge or tearing a coated finish. Support the profile firmly while cutting so it cannot vibrate. Once cut, remove sharp edges with a fine file and test-fit again.
If the threshold meets architrave, frame extensions or an irregular stone reveal, make a template from card first. Repeatedly trimming an aluminium threshold is possible, but it is far better to get the cut correct before the profile becomes too short.
4. Mark and drill the fixing points
Set the threshold back into its final position and mark the fixing holes. Many aluminium profiles are supplied with pre-drilled or recessed screw channels. If yours is not, place fixings at sensible, even intervals, typically around 150mm to 250mm apart depending on the profile and substrate. Keep the first fixing sufficiently in from each end to prevent the aluminium splitting or distorting.
Lift the threshold and drill the substrate. For concrete, use appropriate plugs and corrosion-resistant screws. For timber, screw directly into sound timber where possible. Avoid relying on thin flooring alone, particularly floating laminate or engineered boards, as the threshold needs a stable base below.
Countersink any new holes carefully so screw heads sit flush. Raised screw heads are uncomfortable underfoot, can trap dirt and may catch a door sweep or seal.
5. Seal and fix the aluminium profile
For an external threshold, run a continuous bead of neutral-cure silicone beneath the areas that need weather sealing. Follow the profile design: drainage channels and weep paths must remain open. Filling every void with sealant may appear thorough, but it can prevent water from escaping and cause problems later.
Set the threshold into the sealant, align it with the marks and insert the screws. Tighten them progressively along the length rather than fully tightening one end first. The profile should sit firm and straight, not bowed down by overtightened fixings.
Apply a neat finishing bead only where required at the ends or rear edge. Smooth it immediately with an appropriate profiling tool. On an internal transition strip, sealant may be unnecessary if the profile is designed as a mechanical cover strip, but fixings still need to hold it securely without pinching the floor covering.
6. Test the finished installation
Open and close the door several times and check that it operates freely. Look along the threshold to make sure it is straight, with no rocking or gaps underneath. From outside, inspect the drainage route and ensure it has not been blocked by sealant, debris or the edge of a floor finish.
Finally, clean off metal filings and excess sealant before it cures. Aluminium is low-maintenance, but installation debris can mark nearby flooring and metal swarf left in damp areas may discolour surrounding surfaces.
Common aluminium threshold fitting mistakes
The most common error is selecting a profile based on appearance alone. A slim flat threshold can look excellent between two internal floor finishes, but it will not replace a properly designed external weathered sill. Equally, a large external threshold can be unnecessarily prominent and create a trip point inside a finished room.
Another issue is fixing through a floating floor without allowing the floor to expand. Laminate and many engineered timber floors need an expansion gap at the perimeter. The threshold should cover that gap, not lock the boards in place. Fix the profile into the stable subfloor or frame detail, following the flooring manufacturer's guidance.
Take care with threshold height in accessible routes too. A low-profile or ramped aluminium threshold can reduce a trip hazard, but the final detail needs to suit the doorway, floor build-up and any applicable building requirements. There is no single profile that is right for every entrance.
A well-chosen aluminium threshold is a small finishing detail with a major effect on comfort, weather protection and the overall quality of a doorway. Measure the finished levels, respect the drainage design and use the correct profile for the door in front of you - the result will look considered and perform as it should.
For more information about our interior or exterior doors or door accessories, give us a call at 01603 622261 and speak to a member of our expert team today, or email us at sales@doorsuppliesonline.co.uk. We look forward to hearing from you.