
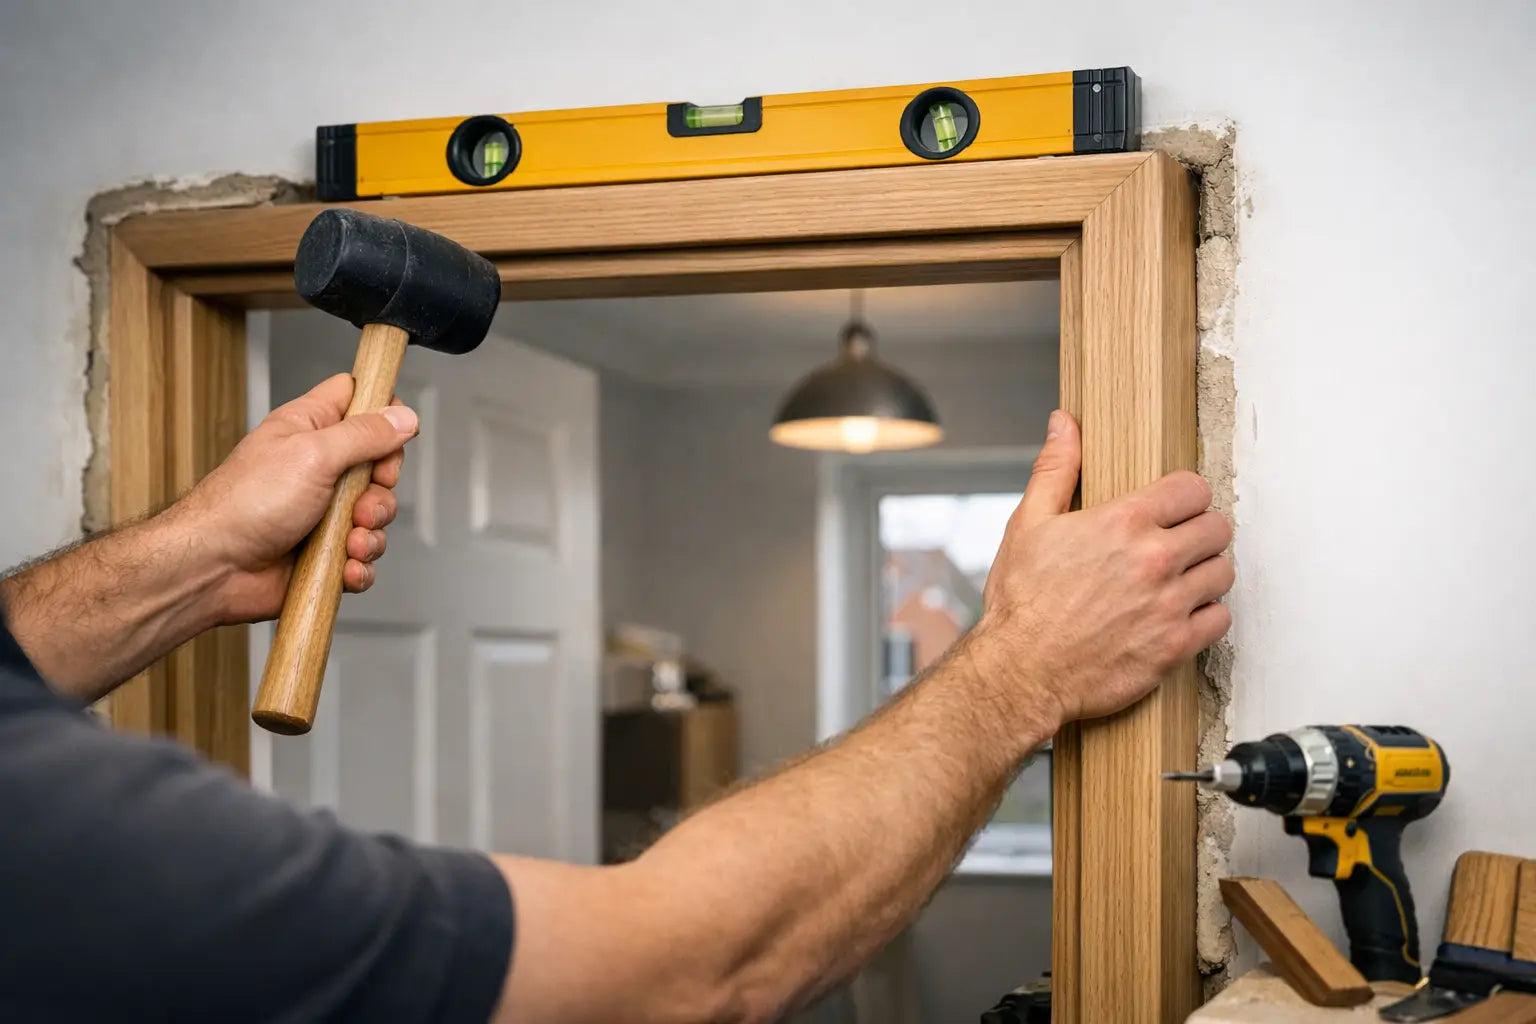
A new door will only operate smoothly if the door frame has been installed accurately. Even the highest-quality door can bind, swing open unexpectedly or fail to latch correctly if the frame is not perfectly square, plumb and level, or if it is fitted at the wrong depth within the wall. That's why understanding how to install a door frame is the first and most important step in any door installation project. Whether you're replacing an existing internal door lining, fitting a new external door frame or preparing for a fire-rated doorset, taking the time to measure the opening correctly and select compatible components will help ensure a professional finish and long-lasting performance.
For most internal door installations, a competent DIYer can fit a door frame successfully using accurate measurements, suitable fixings and the correct tools. Careful alignment is essential to achieve even gaps around the door and smooth day-to-day operation. However, when installing external doors, FD30 or FD60 fire doors, or complete pre-hung doorsets, much tighter tolerances apply. In these situations, the door leaf, frame, intumescent seals, hinges, locks and other ironmongery must all work together as a tested or specified assembly to achieve the required levels of security, fire protection and compliance.
Choose the right frame for the opening
Do not order a frame solely by the door leaf size. Measure the structural opening in three places across the width and height, then use the smallest measurement. Check the wall thickness too, including any finished plasterboard, tile backer or planned wall finish. A lining that is too narrow creates awkward extension work; one that is too deep will stand proud of the finished wall.
Internal door linings are commonly supplied in standard section sizes and can be cut to suit. A door casing is the visible moulding fitted over the joint between the wall and the lining, whereas the lining is the structural timber that carries the hinges and stop. External frames are usually more substantial and may include a cill, weather seals, thresholds and drainage details.
If you are fitting a fire door, use a compatible fire-rated frame or lining. The required specification may include intumescent strips, smoke seals, particular hinge positions and a defined gap around the leaf. A standard internal lining is not automatically suitable simply because it looks similar. For projects where certification matters, a pre-assembled fire door set can reduce the risk of mixing incompatible components on site.
Tools and materials to prepare
You will need a tape measure, pencil, spirit level, straightedge, combination square, drill, and suitable masonry or timber drill bits. Keep a circular saw or handsaw, sharp chisels, a hammer, screwdrivers or an impact driver, clamps, and a pry bar close by. You will also need long fixings appropriate to the wall construction, frame packers, wood screws, adhesive if specified, expanding foam suitable for door installations and decorators' caulk or sealant for finishing.
Use durable, non-compressible packers rather than improvised scraps of soft timber. They hold the frame in position while fixings are tightened and prevent the jamb from being pulled out of line. For fire-rated work, use only the packers, fixings and gap-filling materials permitted by the door set manufacturer or project specification.
How to install door frames before the door arrives
It is easier to fit most frames before hanging the door leaf, but you should have the actual door on site. Its exact thickness, size, handing and hardware arrangement affect the stop position, hinge recesses and clearances.
1. Inspect and prepare the structural opening
Remove the old architrave, frame and loose fixings without damaging the surrounding wall. Clear away old foam, protruding nails and crumbling mortar. Check that the opening is sound and large enough for the new lining, allowing space for packing and adjustment.
Check the floor level across the opening. If the finished floor has not yet been laid, allow for its final height before setting the legs of the frame. This matters particularly with carpet, engineered wood, tile or a threshold: fitting to a temporary subfloor can leave the finished door rubbing or with an excessive gap beneath it.
2. Assemble and cut the lining accurately
Lay the frame components on a clean, level surface. For a supplied lining set, follow the manufacturer's fixing arrangement at the head joint. Check both diagonals once assembled. Equal diagonal measurements indicate that the frame is square.
Cut the jambs to length only after accounting for the finished floor level. A standard internal door normally needs a small clearance at the head and sides, plus an appropriate undercut at the bottom. The correct gap depends on the floor finish, ventilation needs and door type. Do not assume the gaps used for a lightweight bedroom door are suitable for a fire door or an external entrance door.
If the lining is being made from separate timber lengths, use strong head joints and confirm the opening will accept the door leaf with the intended clearances. Fit the door stop after the door has been hung and positioned, unless the lining arrives factory-stopped.
3. Position the frame plumb, level, and square
Offer the assembled frame into the opening, placing packers at the base where needed to achieve the correct finished height. Start with the hinge jamb. Use a long spirit level to make it plumb in both directions, then pack behind it at each fixing point.
Fix the hinge jamb lightly at first. Recheck plumb, then position the head and latch jamb. The head must be level and the latch jamb must be plumb, but do not rely on one measurement alone. Measure the width between jambs at the top, middle and bottom. It should remain consistent and match the door's required opening.
Measure diagonally across the frame again. Small adjustments now prevent a door from swinging open on its own, binding at one corner or refusing to latch later. A frame can look acceptable against an uneven wall while still being out of square, so use the measurements rather than eyesight.
4. Fix through packed points, not empty gaps
Once the frame is correctly aligned, drill pilot holes and secure it through the jambs at the packed locations. Three fixings per side are often a starting point for a standard internal lining, but the wall type, frame height, door weight and manufacturer instructions may require more. Heavy, solid-core, glazed or external doors place greater loads on the hinge side and need suitably substantial fixings.
Tighten each fixing gradually. Overtightening can bow the timber towards the wall, reducing the clearance in the middle of the opening. Check the level and internal width after every major adjustment. If a measurement changes, loosen the fixing, adjust the packer and try again rather than forcing the frame into place.
The void around a conventional internal frame may be filled sparingly with low-expansion foam once the mechanical fixings are secure. Foam is not a replacement for proper fixing. Trim it only when fully cured, and do not use it where the fire-door specification calls for a different tested perimeter seal.
5. Hang the door and set the stops
Mark hinge positions accurately on both the door and the hinge jamb. For many internal doors, three hinges provide reliable support, while heavy doors may need four. Fire doors generally require three or more suitable fire-rated hinges, subject to the door manufacturer's instructions.
Cut clean, flat hinge recesses so the hinge leaves sit flush. Hang the door and test it before fitting stops, architraves or final sealant. Look for even gaps, a consistent reveal at the head, smooth movement and a latch that meets the strike plate without lifting or pushing the leaf.
Set the door stop so it meets the closed door evenly, then pin and glue it where appropriate. Fit the latch, keep, handles and any seals only after the door has been tested several times. Minor adjustments to the strike plate are normal. Re-cutting hinge recesses or planing a large amount from the door edge usually signals that the frame needs correcting instead.
Fire doors and external frames need a different level of care
A fire door is a life-safety product, not just a heavier internal door. Its performance depends on the complete installation: the leaf, frame, intumescent and smoke seals, hinges, self-closing device, latch and perimeter gaps. Trimming beyond the permitted amount, substituting components or filling gaps with unsuitable foam can compromise the rating.
For FD30 and FD60 installations, check the specific product data and any building-control or project requirements before work begins. In communal areas, rental properties and commercial settings, there may be legal duties around specification, installation and ongoing inspection. If there is any uncertainty, use a qualified installer familiar with fire-door work.
External frames also require attention to weathering and security. The cill must drain correctly, seals must compress evenly and fixings must suit the substrate. A frame fitted perfectly square but without correct flashing, sealant or threshold detail can still admit water and draughts. For high-performance or security-rated external doors, fitting the supplied doorset as instructed is generally preferable to assembling separate parts.
Finish without hiding a fitting problem
Once the door operates correctly, fit architraves or external trims. Mitre corners neatly, fix into the lining where possible and use a flexible decorators' caulk for small internal finishing gaps. Avoid covering a badly packed frame with wide mouldings in the hope that the issue will disappear. Movement, cracked finishes and poor door operation will soon expose it.
Prime and finish exposed softwood, especially cut ends, before fitting in moisture-prone areas. For oak, primed or veneered products, use a finish appropriate to the material and keep it clear of hinges, seals and moving hardware.
A properly installed frame is measured more by the quiet click of a closing door than by how quickly it was fitted. If the opening is irregular, the door is unusually heavy or the installation has fire or security requirements, choosing the right frame or a compatible doorset from a specialist range is the most cost-effective place to start.
For more information about our interior or exterior doors or door accessories, give us a call at 01603 622261 and speak to a member of our expert team today, or email us at sales@doorsuppliesonline.co.uk. We look forward to hearing from you.