
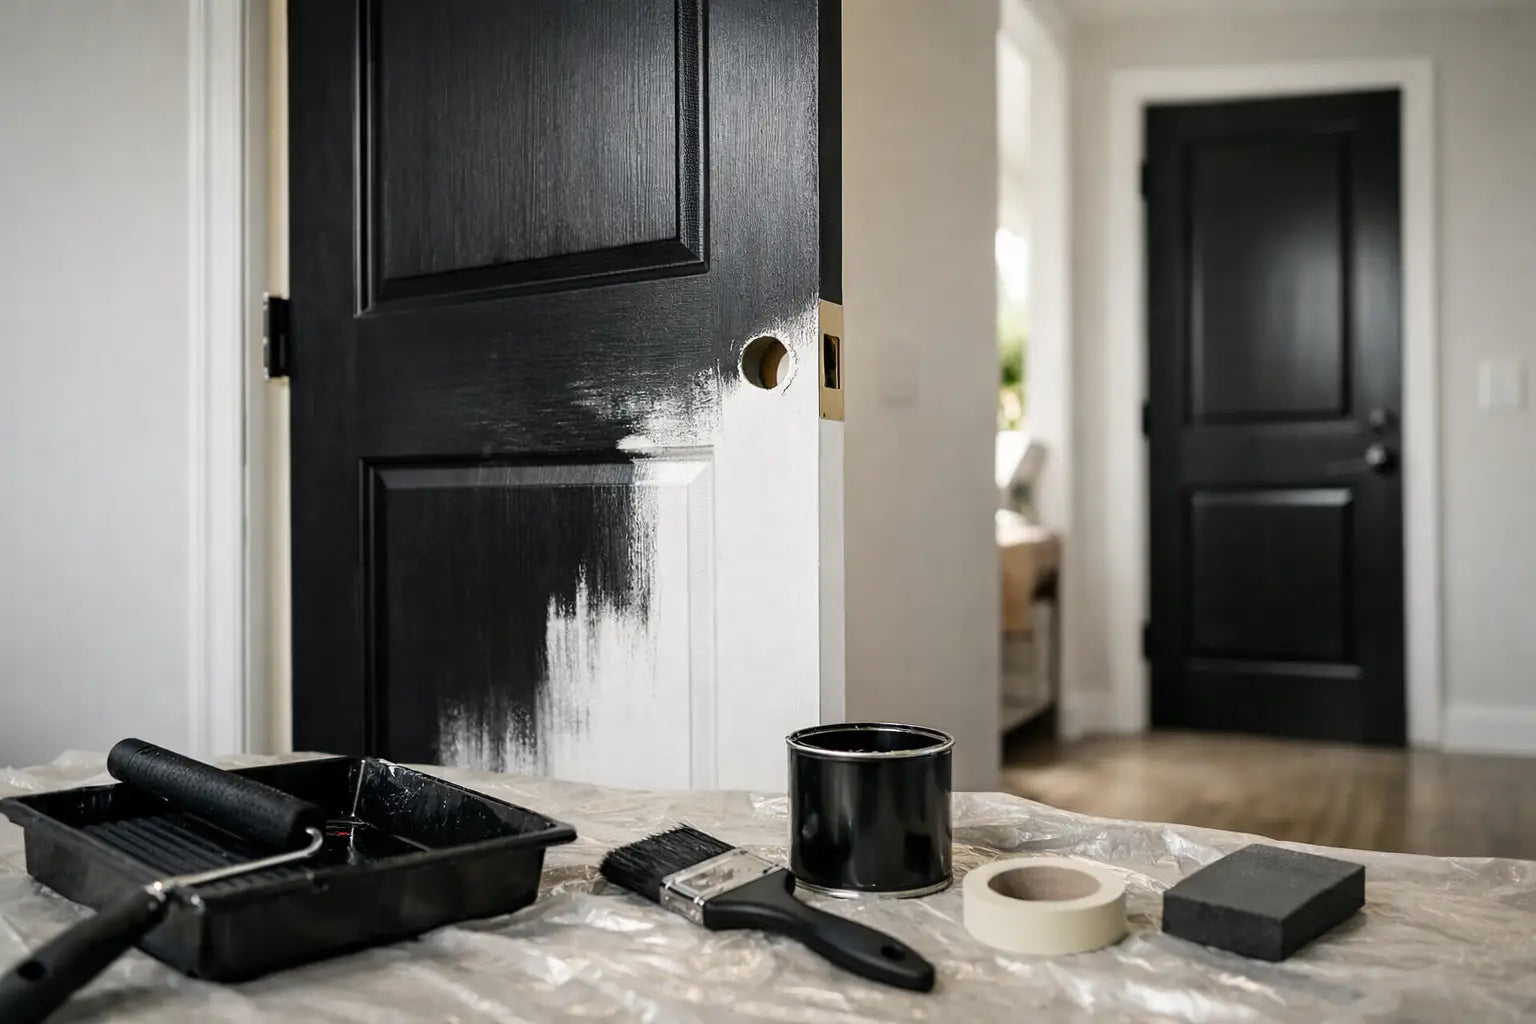
Painting an internal door black is one of the most effective ways to create a bold, contemporary feature within your home. A black internal door can transform plain white walls, light flooring and simple skirting boards into a striking, designer-inspired interior. However, achieving a flawless finish requires more than simply applying a darker paint. Learning how to paint internal doors black involves choosing the right paint finish, preparing the surface correctly and ensuring the door continues to perform as intended.
Black paint works particularly well on panelled doors, Shaker doors, glazed industrial-style doors and flush doors, adding depth and contrast to both modern and traditional interiors. Before you begin, identify the door material—whether it's solid timber, engineered wood, MDF or a previously painted surface—as this will determine the preparation, primer and paint required. If you're painting a fire-rated internal door, it's also important to ensure that any work carried out does not compromise the door's certified fire performance or existing intumescent seals.
Choose the right black paint and sheen
Not every black paint gives the same result. A soft black or charcoal is often more forgiving than a dense blue-black in rooms with limited natural light. Deep blacks create strong contrast against light walls, while warmer black tones can sit more comfortably alongside oak flooring, brass ironmongery and traditional furniture.
For most internal doors, a water-based interior wood and metal paint is the practical choice. Quality water-based finishes dry quickly, have a lower odour than traditional solvent-based gloss and are less likely to yellow over time. They are also suitable for occupied homes where doors need to be back in use promptly.
The sheen level matters as much as the colour. Satinwood offers a subtle sheen and is a reliable all-round option for busy hallways, bedrooms and living areas. Eggshell is flatter and more contemporary, but it can be less resistant to scuffs depending on the product. Full gloss gives a striking, formal appearance, although its reflective surface highlights imperfections more readily.
If you are painting several doors, buy sufficient paint from the same batch where possible. Black is less prone to visible variation than some colours, but a consistent product and application method will still give a more uniform finish across the property.
Check the door before you paint it black
A new primed door, a previously painted door and a veneered or oak door need different treatment. Never assume that a door can simply be coated because it looks smooth.
A factory-primed internal door is usually the simplest starting point. Check the manufacturer's finishing instructions, lightly abrade the primer and apply the recommended topcoat system. Bare softwood or MDF requires a suitable primer before black paint goes on. MDF edges are especially absorbent, so seal and sand them carefully or they can remain rough even after multiple coats.
Previously painted doors need a closer inspection. If the existing coating is sound, clean it, sand it to create a key and use an appropriate undercoat if changing from a pale colour to black. If paint is cracked, flaking or heavily textured, remove the failed material first. Painting over poor adhesion only delays the same problem.
Veneered doors deserve extra care. Aggressive sanding can cut through a thin veneer and leave an irreversible patch. A light sanding by hand is normally enough, followed by a primer designed for the existing surface where required. If you have bought a finished oak, walnut or pre-finished internal door for its natural grain, painting it black is a permanent design decision worth considering before work begins.
Do not overlook fire doors
An FD30 or FD60 internal fire door is a tested fire-resisting assembly, not just a heavier door leaf. The leaf, frame, hinges, intumescent strips, seals, glazing and closer can all contribute to its performance.
Check the door manufacturer's instructions before decorating. Do not paint over intumescent strips or smoke seals, obscure the fire door label or alter the door edges by excessive sanding. Avoid filling gaps that are required for the door to close correctly, and do not remove a self-closing device simply because it is inconvenient during painting. Where a certified fire door set is involved, keep the specification intact and seek professional advice if there is any doubt.
Tools and materials for a clean finish
The job is straightforward, but good results depend on having the correct basics to hand. You will normally need:
- A screwdriver, dust sheet and masking tape
- Sugar soap or a suitable degreaser, clean cloths and a vacuum
- Fine abrasive paper, a sanding block and a tack cloth
- The correct primer or undercoat, black topcoat, a quality brush and a small foam or microfibre roller
A 4-inch roller is ideal for broad flat sections, while a good angled synthetic brush helps with mouldings, panels and edges. Cheap brushes tend to shed bristles and leave heavy lines that stand out against black paint. Do not use a roller that has previously held a pale colour unless it has been cleaned thoroughly.
How to paint internal doors black step by step
Whenever practical, remove the door from its hinges and lay it flat on trestles. This reduces the risk of runs and allows you to finish the edges properly. It is not essential, particularly in a lived-in home or where a fire door must remain fitted, but it produces the best result when space allows.
Start by removing handles, latches, escutcheons and door stops where possible. This is neater than painting around them and gives you the opportunity to update the ironmongery at the same time. If hinges are staying in place, mask them precisely rather than painting over them. Black-painted hinges can look untidy and may affect smooth operation.
Clean the entire door, including the top edge, lock stile and hinge side. Household polish, grease from hands and airborne cooking residue can all affect adhesion. Once dry, sand lightly until the surface feels uniformly dull rather than shiny. You are creating a key for the paint, not trying to remove sound coatings. Vacuum the dust, then wipe with a tack cloth or a slightly damp lint-free cloth.
Apply primer or undercoat only where the paint system calls for it. Bare timber, filled repairs, exposed MDF and dramatic colour changes generally benefit from it. A tinted grey undercoat is often useful beneath black, helping the topcoat achieve a solid depth without unnecessary heavy coats.
Paint the mouldings and recessed panels first, using the brush to work paint into corners without flooding them. Then use the roller on the flat rails, stiles and larger faces, laying off gently in one direction. Work quickly enough to maintain a wet edge. Going back repeatedly over partly drying black paint is a common cause of drag marks and uneven sheen.
Let the first coat dry fully according to the tin, not just until it feels dry to the touch. Lightly sand between coats with fine abrasive paper, remove all dust and apply a second thin coat. Two controlled coats are usually better than one thick coat. Some doors, particularly white doors changing to black, may need a third coat for a fully even result.
If painting in position, finish one face at a time and leave the door slightly ajar until it is dry enough not to stick to the frame. Take care around the latch edge. Paint build-up here can cause the door to bind, and a door that no longer closes correctly is not acceptable, especially where fire separation is required.
Pair black doors with the right frame and hardware
A black door does not always need a black frame. Painting the frame and architrave in the same shade creates a confident, architectural look, particularly in contemporary renovations. Keeping the frame white makes the door the focal point and can prevent a narrow hallway from feeling too dark. In period properties, a darker door with off-white mouldings often gives a more balanced finish than stark bright white.
Hardware should be chosen before painting, not as an afterthought. Matte black lever handles create a coordinated appearance but can disappear against a black door, so shape and texture become important. Satin brass, antique brass and polished chrome provide clearer contrast. For bathrooms and bedrooms, ensure privacy locks, hinges and escutcheons are specified as a matching set rather than mixing finishes.
Door Supplies Online offers internal doors, frames and ironmongery that make it easier to plan the finished look as a complete set. This is particularly useful when replacing several doors, where consistent panel style, handle choice and hinge finish make a noticeable difference.
Avoid the shortcuts that spoil black doors
The most frequent mistake is skipping preparation because the existing finish looks clean. Black paint will magnify greasy fingerprints, old roller texture and rough filler repairs. The second is applying too much paint, which leads to drips on panel edges and a thick coating around hinges and latches.
Also allow proper curing time. A door may be dry enough to close within hours, but the finish can take days to harden fully. Avoid slamming it, fitting tight draught seals or cleaning it aggressively until the paint manufacturer's curing period has passed.
A properly painted black internal door should feel as considered as a new piece of joinery, not like a quick colour change. Take the time to prepare every edge, choose hardware that earns its place against the dark finish, and the result will give the room definition for years rather than months.
For more information about our interior or exterior doors or door accessories, give us a call at 01603 622261 and speak to a member of our expert team today, or email us at sales@doorsuppliesonline.co.uk. We look forward to hearing from you.