
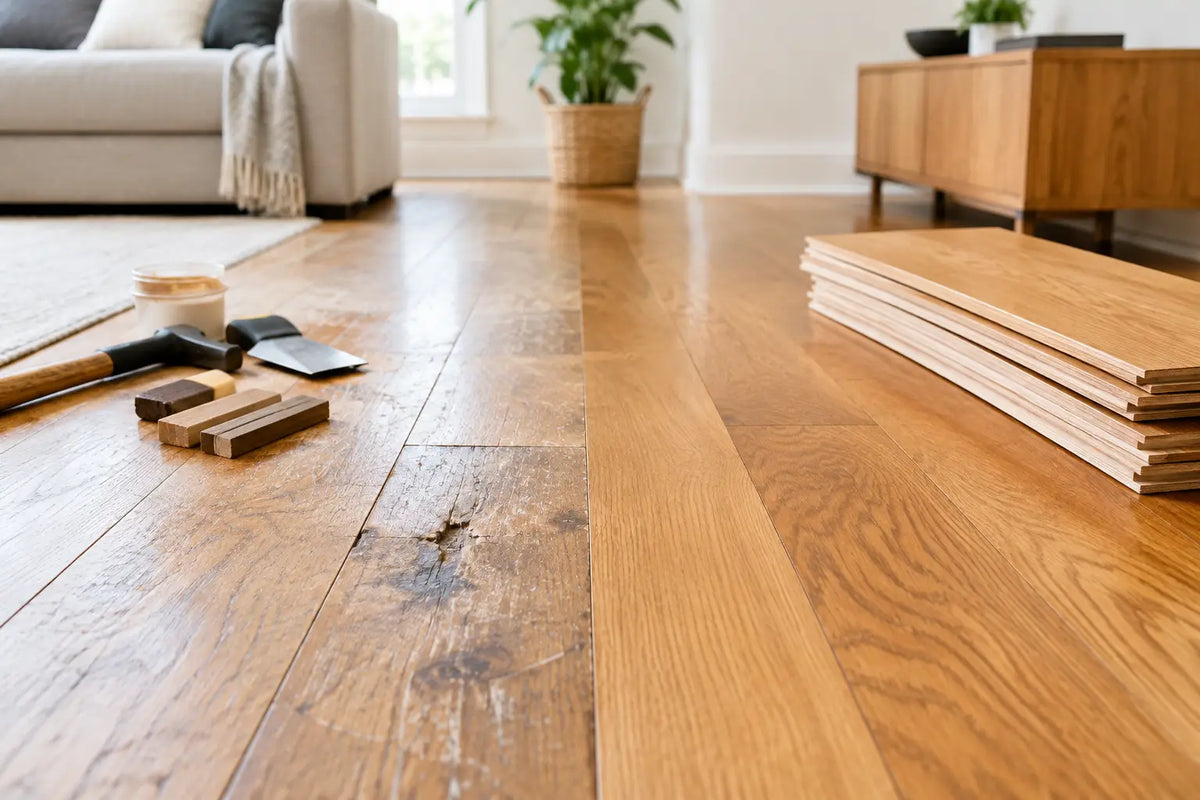
An oak floor can start to look tired long before it reaches the end of its useful life. Scratches, faded or grey patches near patio doors, gaps between floorboards and a worn finish are common problems in busy UK homes. A carefully planned oak flooring renovation can restore the natural beauty of real wood, improve the appearance of your interior and extend the life of your existing floor. However, the best renovation method depends on the type of oak flooring, the condition of the boards and the underlying cause of any damage.
Before arranging professional floor sanding or purchasing replacement boards, it is important to identify whether you have solid oak flooring, engineered oak flooring or a veneer-faced wood floor. Each construction has different repair and refinishing limitations. Solid oak flooring can generally withstand more sanding, while engineered oak flooring depends on the thickness of its real wood wear layer. Veneer-faced products may have very limited scope for sanding.
Understanding your floor's construction helps you choose the right oak floor restoration or replacement solution, avoid unnecessary costs and achieve a longer-lasting result. Whether you are repairing damaged boards, refinishing worn surfaces or planning a complete flooring upgrade, knowing your options is the first step towards a successful oak flooring renovation.
Start with the construction of your oak floor
Solid oak flooring is made from one piece of timber. It can usually be sanded several times over its lifetime, provided the boards have enough thickness remaining and are not badly cupped, split or structurally loose. It is a strong candidate for renovation where the wear is mostly cosmetic.
Engineered oak flooring has a real oak wear layer bonded to a stable plywood or multi-layer core. Quality engineered boards can often be refinished, but the wear layer may be only a few millimetres thick. Aggressive sanding can cut through to the core, leaving an expensive problem rather than a restored floor. Check the manufacturer’s specification where possible, or ask a professional to assess an inconspicuous edge or threshold.
Laminate flooring printed with an oak effect cannot be sanded or refinished. Local damage may sometimes be addressed by replacing individual boards, but a widespread worn surface normally calls for replacement.
Assess the issue before choosing a renovation method
Not every mark requires a full room sanding job. Surface-level scratches in an otherwise sound finish may respond well to a deep clean and a compatible maintenance product. A floor with worn lacquer, widespread scuffing and shallow scratches is more likely to benefit from a full sand and refinish.
Deep gouges, black stains and broken edges need closer inspection. Black staining often indicates prolonged moisture exposure or a reaction between tannins in the oak and metal. Sanding may reduce light staining, but stains that have travelled deep into the timber may remain visible. In these cases, replacing selected boards can produce a better result than continually removing more material.
Movement is another warning sign. Seasonal expansion and contraction are normal in timber floors, particularly where central heating creates dry indoor conditions during winter. However, wide or growing gaps, raised edges, cupping and boards lifting from the subfloor can point to moisture, poor acclimatisation, insufficient expansion space or an underlying subfloor issue. Fix the cause first. Refinishing a floor that is still moving or becoming damp will not last.
Check moisture around doors and external walls
Oak floors often show the first signs of water damage near entrance doors, French doors, kitchens and utility areas. Look for failed seals, leaking thresholds, wet doormats, condensation and poor drainage outside. If the timber feels damp, smells musty or has developed extensive cupping, the room may need time to dry before any repair begins.
This is especially relevant when replacing external doors or altering openings. A new threshold, correctly detailed weather seals and suitable floor clearance can protect the renovated finish. Avoid trapping the floor beneath frames or skirting in a way that removes the expansion gap required by the manufacturer.
When sanding is the right choice for oak flooring renovation
Sanding is worthwhile when boards are stable, generally flat and thick enough to support it. It removes old lacquer or oil, evens out surface wear and gives the new finish a clean, consistent base. It can also bring out the grain and warmth that made oak the preferred flooring choice in the first place.
For a full renovation, professional dust-controlled sanding is generally the safest route. Floor sanding machines can remove material quickly, and poor technique can create dips, chatter marks or rounded board edges that are difficult to correct. A specialist can also identify nails, staples and loose boards before the main sanding stages begin.
A typical process involves securing loose boards, punching down fixings, sanding progressively with finer abrasives, filling appropriate small gaps, then applying the chosen finish. Large seasonal gaps should not automatically be filled, as rigid filler can crack or be forced out as timber moves. A good contractor will judge which gaps are defects and which are part of the floor’s natural movement.
If the floor has previously been sanded, be cautious. The aim is to remove the old coating and damage, not to keep sanding until every dark mark disappears. Preserving the thickness and profile of the boards matters more than achieving a perfectly uniform appearance.
Choose a finish that suits how the room is used
The finish determines both the appearance of the oak and the maintenance it will need. There is no single best option for every property.
Lacquered finishes create a protective film over the timber and are a practical choice for family rooms, hallways and rental properties. A quality matt lacquer gives a more natural look than older glossy coatings while offering good resistance to everyday spills and dirt. Once a lacquer is worn through in a high-traffic route, however, it usually needs more than a quick spot repair.
Hardwax oil soaks into the surface and leaves a more tactile, low-sheen finish that suits traditional homes and contemporary interiors alike. It is often easier to repair locally, making it useful where pets, children or regular footfall make isolated scuffs likely. The trade-off is regular maintenance. An oiled floor needs the correct cleaning products and periodic re-oiling before it looks dry or starts absorbing moisture.
Colour should be considered carefully. Clear finishes allow oak to mellow naturally, usually becoming warmer over time. Pale or white-pigmented oils can reduce yellow tones and suit a lighter scheme, but may show dirt more readily. Dark stains can be striking, yet they tend to highlight scratches and sanding imperfections. Test a sample on the actual timber rather than relying on a small colour chart.
Repairing individual oak boards
Replacing a small number of damaged boards is often the sensible middle ground between a cosmetic repair and a complete new floor. It works particularly well where there are burn marks, deep water stains, impact damage or a section that has warped beyond recovery.
Matching is the challenge. Oak varies in grade, grain pattern, colour and board width, and existing floors naturally change colour with age and light exposure. New boards may look noticeably lighter at first. Choose the closest available profile and grade, then allow for a degree of variation. A final sand and finish across the wider area can help blend repairs into the existing floor.
Take care with tongue-and-groove boards and floating engineered floors. Removing one board can affect those around it, while glued joints and underfloor heating systems increase the risk of damage. A competent fitter can cut out and replace a board without disturbing an entire room, but this is not always a straightforward DIY repair.
When replacement makes better financial sense
Renovation is not automatically the cheaper option. Replacement may be the better decision when the floor has a thin engineered wear layer, major moisture damage, severe movement, widespread repairs or an outdated layout that no longer suits the room.
It can also be worthwhile where a renovation project involves opening up rooms and you need a continuous finish across new and existing areas. Trying to match a discontinued oak floor can become costly and still leave visible transitions. A new floor gives more freedom over plank width, grade, tone and installation method.
For rooms with underfloor heating, select flooring specifically rated for the system and make sure the heating is commissioned gradually. Engineered oak is often chosen for its improved dimensional stability, but the supplier’s temperature limits, adhesive specification and installation guidance must still be followed. Excessive heat can dry the timber and create gaps even in a quality floor.
Plan the room around the finished floor level
A renovated or replacement floor affects more than the boards themselves. Check clearances beneath internal doors, the height of thresholds, transitions to adjoining rooms and skirting details before work starts. Sanding removes only a small amount of material, but a replacement floor may sit higher or lower than the existing one depending on the underlay and subfloor preparation.
If doors need trimming, retain the correct bottom clearance and avoid compromising the construction of fire doors. Fire doors are tested assemblies, so they should only be altered within the manufacturer’s permitted limits and fitted with the required gaps and seals. This is one area where design coordination must not override fire safety.
For a coordinated refurbishment, Door Supplies Online can help you specify complementary internal doors, skirting, mouldings and ironmongery alongside the flooring. Matching undertones matters: a warm natural oak floor can clash with cool grey oak-effect finishes, while black hardware can provide a deliberate, clean contrast.
Keep the restored finish looking right
Once the work is complete, prevention is less expensive than another renovation. Use breathable mats at entrances, fit felt pads beneath furniture, wipe spills promptly and avoid soaking the floor during cleaning. A vacuum with a suitable hard-floor head or a soft brush is preferable to dragging grit across the surface.
Use cleaners made for the finish on the floor - oil soap for an oiled surface is not interchangeable with a lacquer floor cleaner. Keep indoor humidity reasonably stable where possible, particularly in winter, and use blinds or curtains to moderate strong direct sunlight if one area of the floor is fading faster than the rest.
A good oak floor should carry the evidence of real life without looking neglected. Start with an honest assessment of the timber and the room around it, then choose the repair, finish or replacement route that will continue to work long after the first fresh coat has dried.
For more information about our interior or exterior doors or door accessories, give us a call at 01603 622261 and speak to a member of our expert team today, or email us at sales@doorsuppliesonline.co.uk. We look forward to hearing from you.